
What Slate Coasters Taught Me
After three videos, a pile of test coasters, and more tinkering than I probably needed, I learned something simple about slate coasters: they are easy right up until they are not.
They look straightforward. Small piece of stone. Engrave it. Wipe it off. Admire your work. Move on.
But slate has a way of humbling you.
This series ended up becoming three separate questions for me. First, what prep and finish steps are actually worth doing on slate coasters, and which ones are optional or just not worth the trouble. Second, what does my full coaster workflow really look like from start to finish once I stop skipping over the messy middle. Third, can you engrave an actual photo on slate and get something you would genuinely want to keep.
And somewhere in the middle of all that, I got a little obsessed with the testing.
Probably more than a little.
What surprised me most about slate
The first big lesson is that slate is not as consistent as it looks. A stack of coasters can seem identical until you start paying closer attention. Some are a little thicker. Some are slightly out of square. Some have less usable engraving space than you thought. Even within the same batch, those small differences can show up later when it is time to focus and engrave.
That is why I found myself checking shape, thickness, and actual usable space instead of trusting the size on the listing. I even like doing a quick sound check while sorting because a dull sound can hint at a hidden crack, and heat has a way of revealing problems.
That one lesson alone explains why slate can feel unpredictable.
It is not always your settings. Sometimes it is the material reminding you it has its own personality.
What was actually worth doing every time
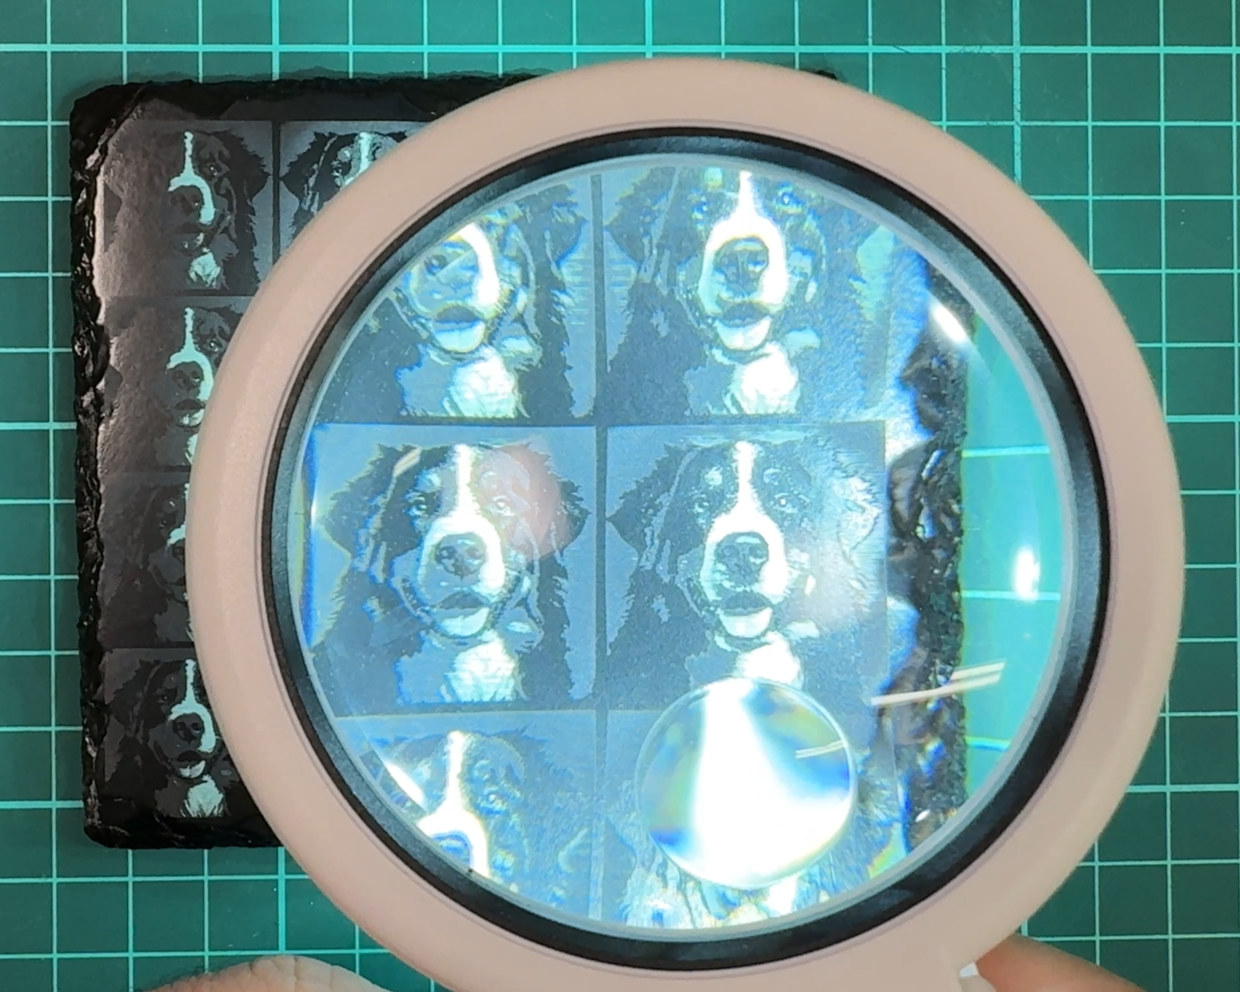
The test often tested me…
I try to pay attention to detail, as much as my old eyes will allow me to. I finally gave up and had to admit I needed help. This little magnifying glass was the answer to a lot of prayers. Should have gotten it sooner. That’s for sure.
One of the strongest conclusions from this whole series was that the simple steps matter the most.
Cleaning the slate before engraving is worth doing. I like using alcohol because it removes oils and dirt quickly and evaporates fast. But just as important, maybe even more important, is cleaning the slate after engraving before judging the result. Slate dust can make the engraving look worse than it really is. More than once, I thought a coaster looked a little flat right off the laser, only to wipe it down and realize it turned out much better than I first thought.
Dust lies.
Testing on actual slate is worth doing too. Not a random setting from the internet. Not wishful thinking. Actual slate from the batch you are using. I kept coming back to recommended settings as a starting point, but not as the answer. Slate is just too inconsistent for blind copying to work well.
Framing the job is one of those boring steps that saves you from exciting mistakes. It matters even more when some coasters are a little smaller or not perfectly square. And when you are troubleshooting light engraving, the problem is usually not one giant mistake. It is a few small things stacking up against you. Surface. Lens. Air assist. Focus. Design.
That is one reason I ended up making a checklist out of all this.
Yes, you can rescue old test coasters
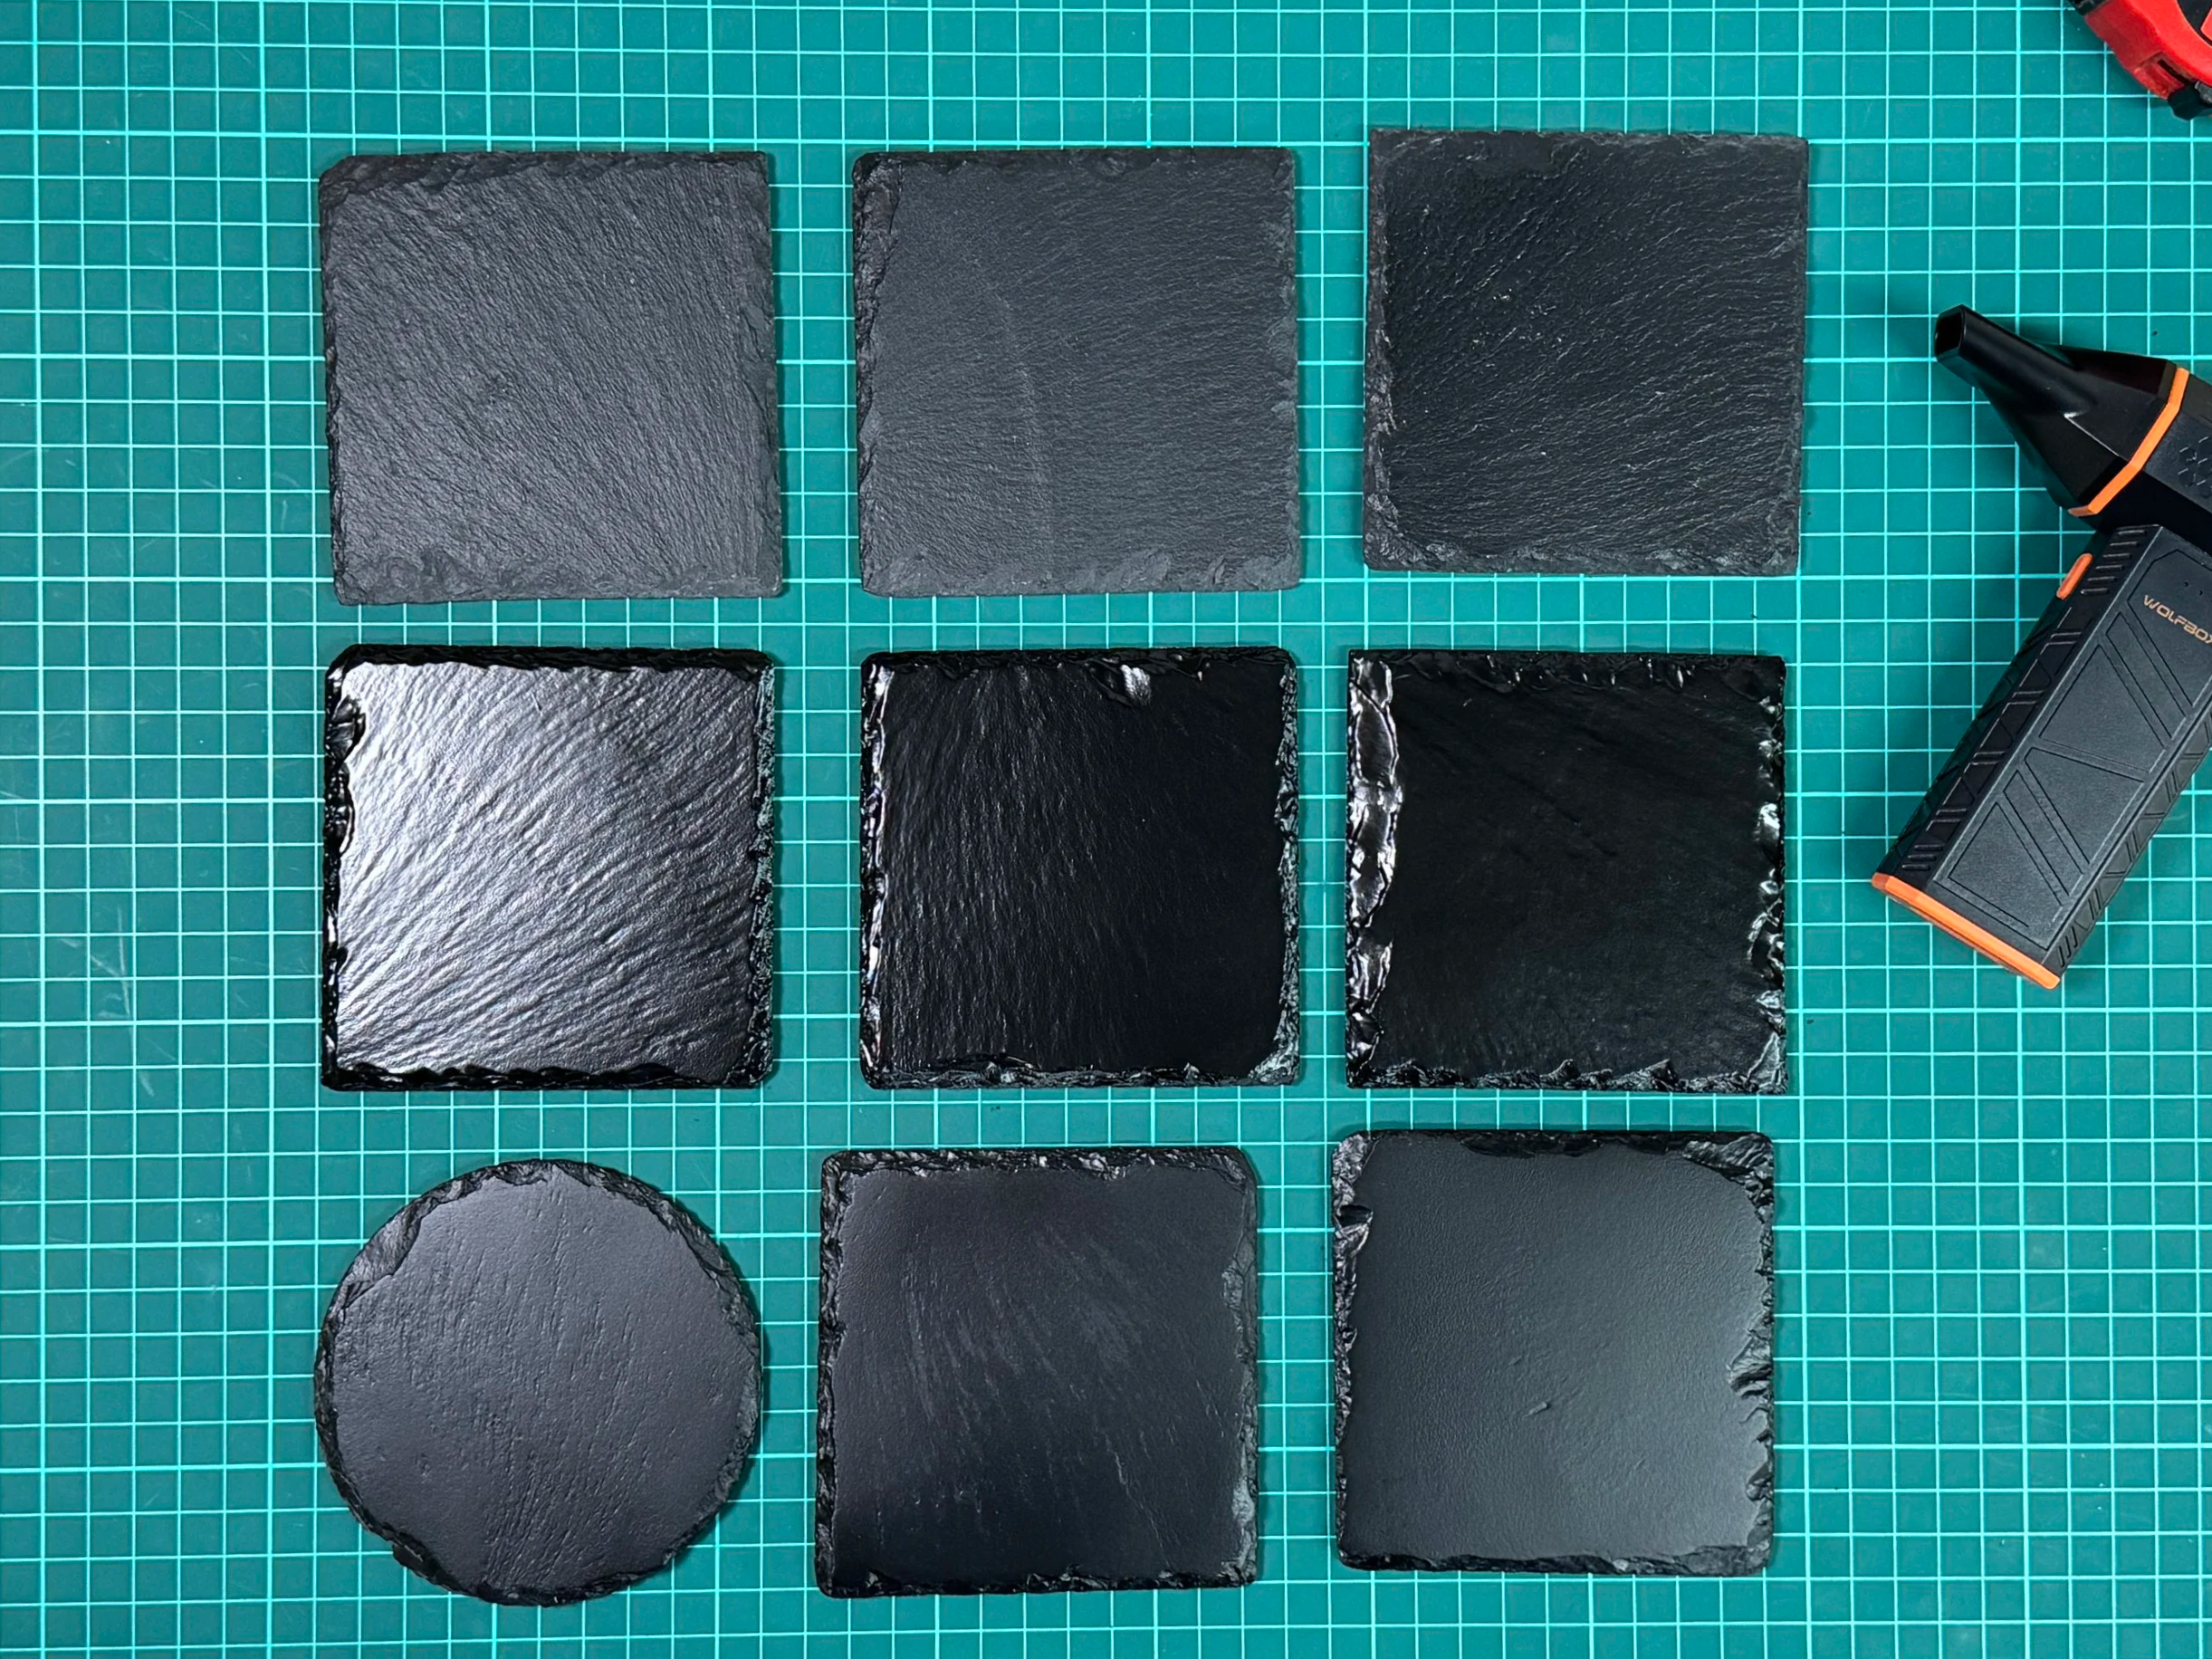
The line-up: Lacquer, Black Acrylic and WWGB
I had to make sure I tested thing thoroughly, and this is a small sample of what I worked with. WWGB is my quick way of saying 2 coats of white, 1 coat of gray and 1 coat of black acrylic paint.
One of the most useful parts of this series came out of a very practical problem: I did not have unlimited coasters for testing.
So I sanded old engravings off and reused those coasters.
That works.
It is not glamorous, but it is practical. If you are burning through test pieces, reclaimed coasters can absolutely keep a project moving. But there is a tradeoff. Sanding changes the coaster. It gets thinner. It gets smoother. It loses some of that original slate texture.
In some cases that smoother surface can actually look pretty good. In other cases, it stops feeling like the same coaster you started with. So yes, reclaimed coasters are a win for testing. Just do not expect them to come back unchanged.
Also, do not sand them like you are angry at the coaster. That never ends well.
That lesson ended up being bigger than coasters.
A lot of laser work is like that. You save a material, but the save creates a new version of the material. That is not bad. You just need to know what changed.
When testing turns into chaos
This may have been the most useful mindset shift in the whole series.
At some point, if you keep adding variables, you are not really testing anymore. You are just making it impossible for future you to know what went wrong.
That hit hard because it is true.
Slate does not need extra chaos. It already brings enough of its own. So one of the best things I learned was to start with the raw slate baseline first. Clean stone. Test grid. Known settings. Then, once that is working, add coatings, finishes, or other style choices on purpose. Not all at once. Not while hoping the coaster will somehow explain itself afterward.
That is probably the biggest practical takeaway I would pass on to anyone starting with slate.
Keep it simple until you have a reason to complicate it.
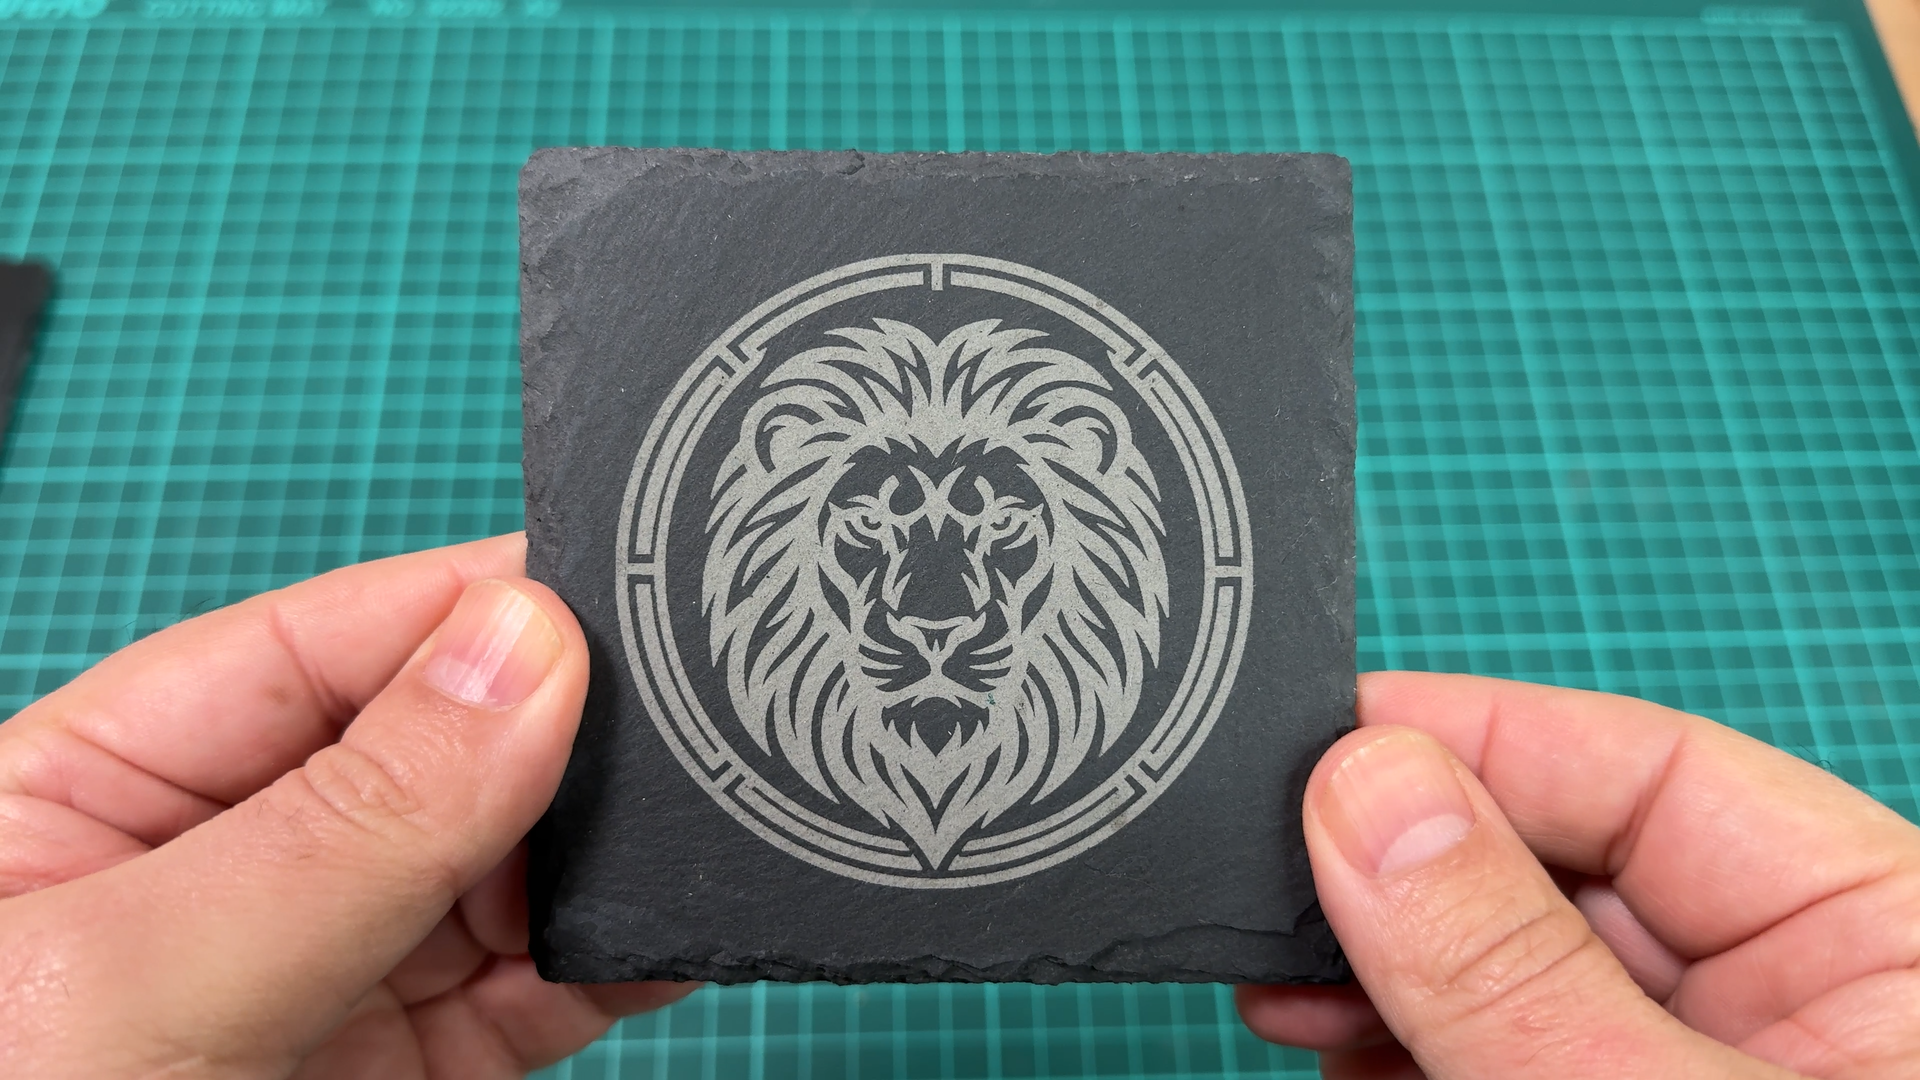
Photo engraving works, but it changes the game
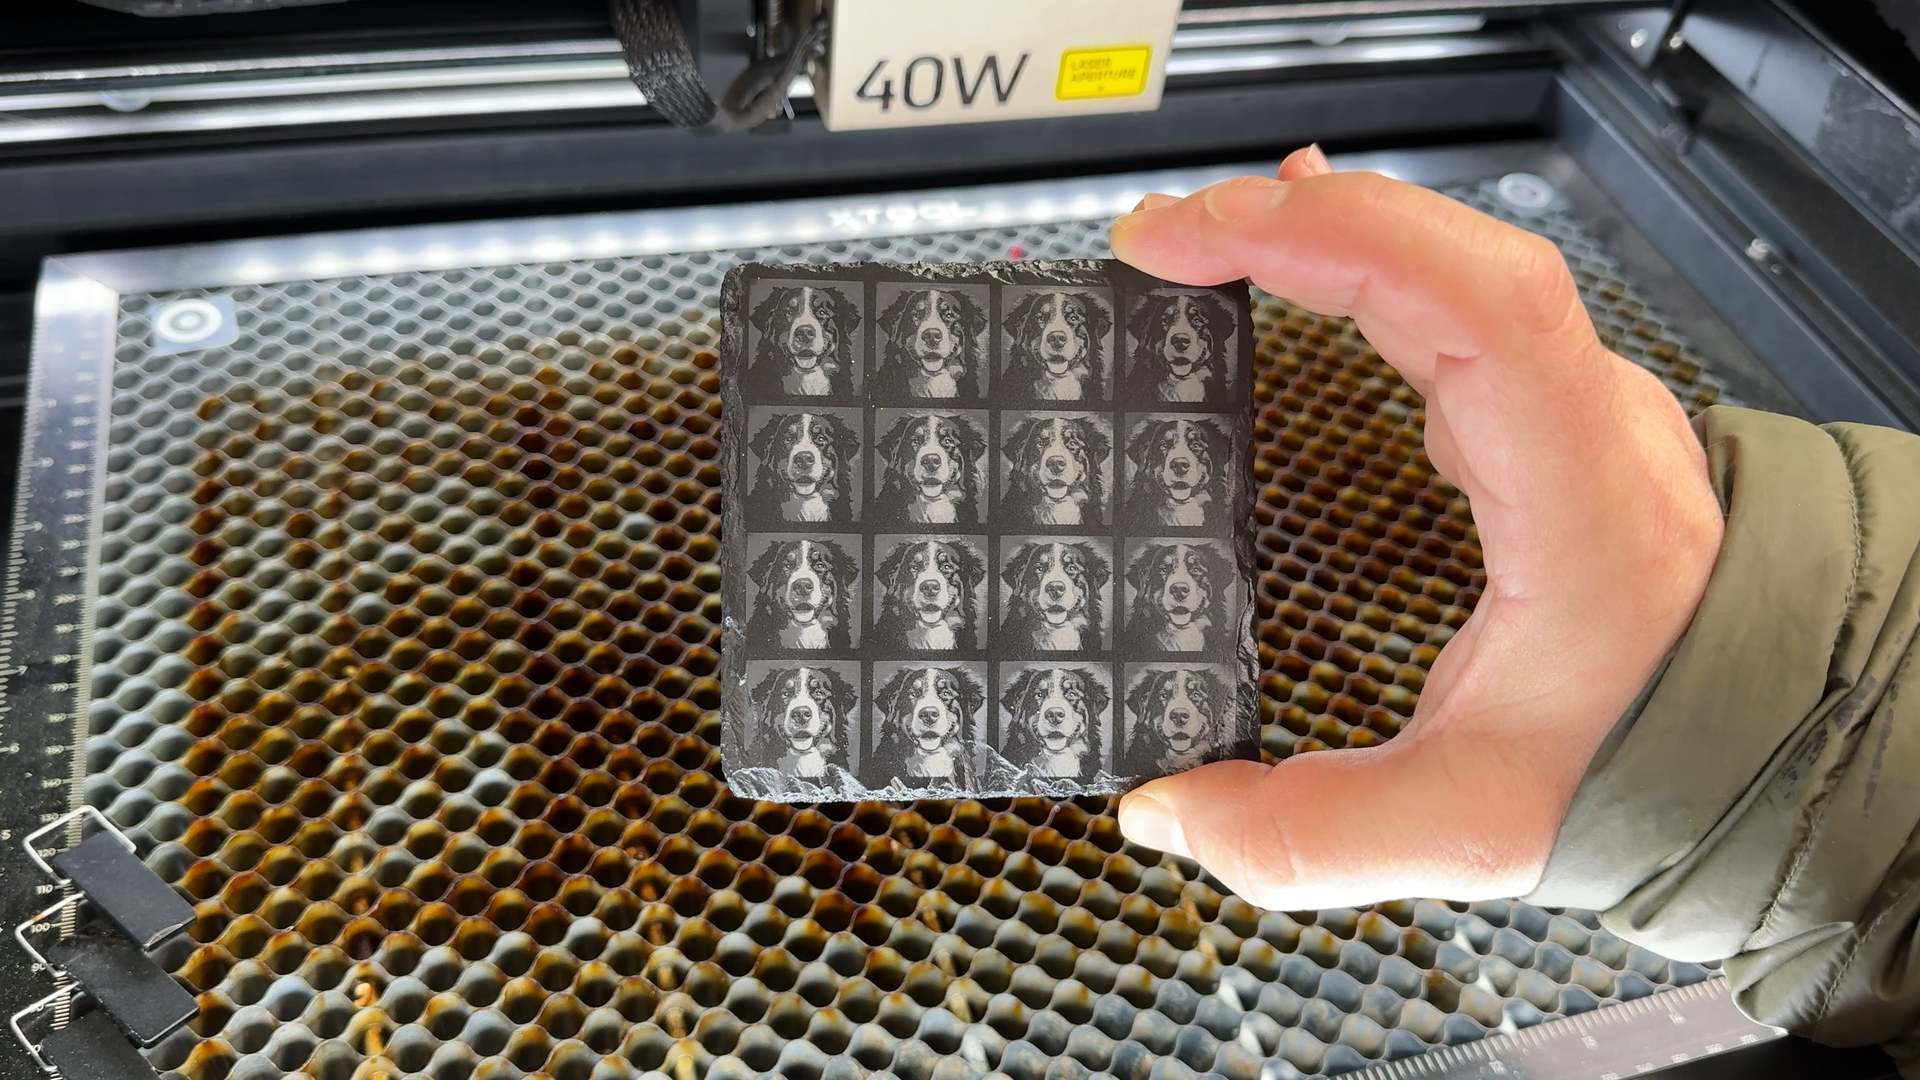
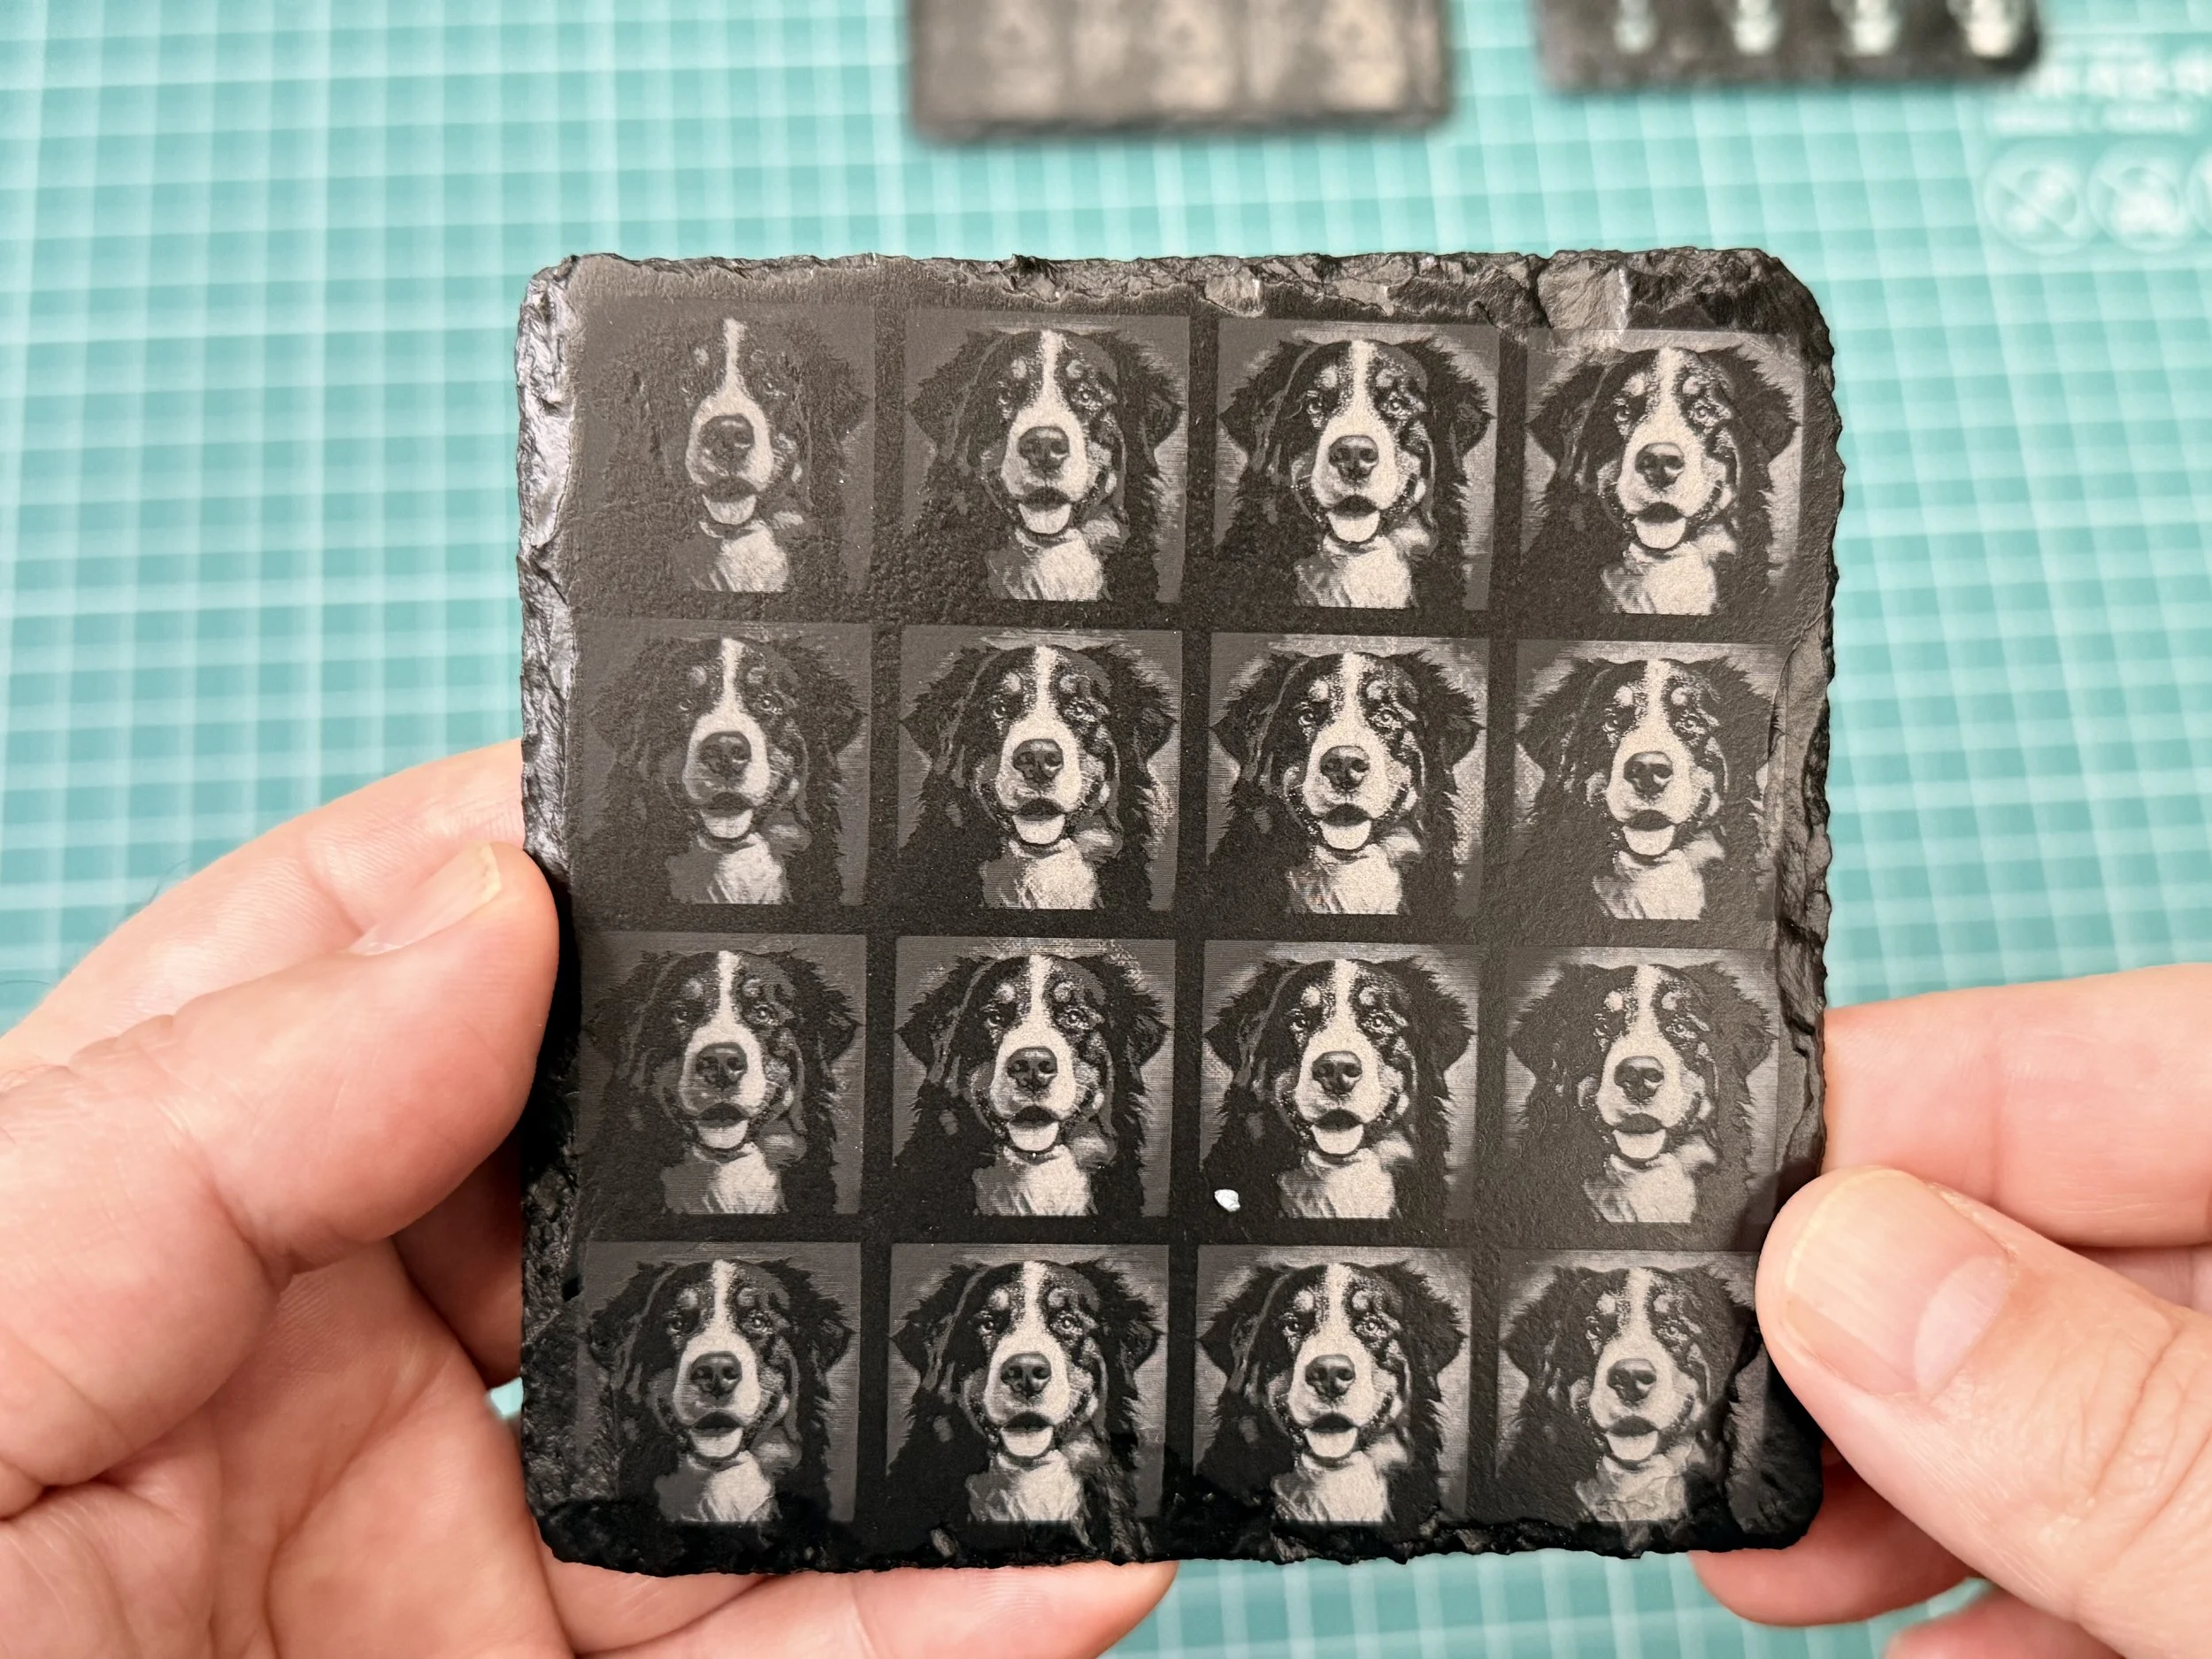
Photo engraving on slate is absolutely doable. That was one of the biggest questions people had, and the answer is yes. But it is a different workflow from engraving a clean black and white vector. It asks more from the image prep and more from the testing.
One thing I really liked here was using the exact photo I planned to engrave as the test image. You can use a gradient image if you want a more scientific test, but I kept it simple. Same photo, just shrunk down. That gave me a better feel for how the actual engraving would behave.
From there, a few quick edits mattered a lot. Grayscale. A little contrast. Sharpness pushed hard. And then the one that really matters on black surfaces: invert the image. If you skip that on black slate or other black materials, the engraving is not going to come out right.
That is one of those tiny settings that can quietly ruin the whole result.
Photo testing also reinforced something else I kept seeing through this series: you do not need to make this more complicated than it needs to be. Start from a solid baseline. Test your way toward the look you want. And if a sanded coaster gives you more detail for the photo, that may be worth exploring too.
Finish choices are really use case choices
This was another big lesson.
At first, finish choices can seem like a style question. And yes, style is part of it. If you want a bold showpiece, lacquer or paint can absolutely make the engraving pop more. That extra contrast can look great. But I found myself caring less about what looked most dramatic in a quick reveal and more about what made sense for the kind of coaster I was actually making.
That is where use case starts to matter more than appearance alone.
If the coaster is mostly for display, coatings can make a lot of sense. If the coaster is actually going to live on a table, hold drinks, and deal with daily life, I lean in a different direction. Raw slate becomes very appealing because it keeps things simple. And mineral oil also started making a lot of sense for me because it is food safe, gives the stone a richer tone, and helps the engraving stand out a bit more without turning the whole thing into a chemistry project.
I also did a very unscientific but very real home test using two slate coasters for the same job with a glass of ice water. One was raw slate and one had lacquer. Both cleaned up, but the raw slate clearly came out better for everyday use. No weird surprises. No marks. Raw slate quietly won in my house.
That does not mean lacquer is wrong. It just means the right answer depends on what you want the coaster to be.
That was one of the more useful conclusions from the entire series.
Not every better looking finish is the better everyday finish.
Air, dust, and focus can quietly wreck a coaster
There were also a few smaller lessons that kept showing up.
Too much air assist can cool the stone or stir up more dust than you want, which means it can actually work against the white contrast you are trying to get. Lens maintenance matters too, especially if you are doing several coasters in a row. And when something looks off, it usually makes more sense to check one variable at a time than to assume the whole process failed.
That pattern came up over and over again.
Small issues. Stacked together. Quietly ruining the result.
That is exactly the kind of thing that makes slate feel frustrating until you realize what is happening.
Why I put together the checklist
By the time I finished this series, I did not feel like I had found one magic setting.
What I did feel was that I had a much better sense of what matters every time, what is optional, and what can quietly throw things off if you are not paying attention.
That is why I put together the stone coaster checklist. Sign up for my newsletter and you will get access to the file (pdf).
It is not meant to be fancy. It is meant to be useful. Something you can keep nearby before engraving so you can catch the quiet problems before they become wasted time, wasted material, or one more coaster you are tempted to sand back into existence later.
Because that was really the whole point of this series.
Not to prove I had the perfect method.
Just to test enough, mess up enough, and pay attention enough to come back with something useful.
And honestly, that is usually where the good lessons come from anyway.